 By Graham Fisher
Most Keurig problems clear up with a proper reset, a quick check of the water path, or a descale. In this guide you’ll learn how to reset a Keurig K-Cup brewer, which error messages call for which fix, and how to tell when a reset won’t help and the machine needs more attention. The steps apply to most Keurig single-serve brewers, though button sequences differ by model, so your owner’s manual has the final word.
Keurig Troubleshooting How to Reset: Start With the Basics
Before you reset anything, run through a short checklist. Many “broken” Keurigs are simply in a state the machine won’t brew from, and a few seconds of checking will save you time.
- The water reservoir is seated fully on the back of the brewer and the lid is closed.
- The reservoir has water in it, above the minimum line.
- The K-Cup pod is inserted correctly, with the foil side facing the needle, and the handle is fully lowered.
- The drip tray and pod holder are in place and not overfull.
- The brewer is plugged into a working outlet, and the outlet isn’t switched off or on a faulty power strip.
If all five check out, move on to a power reset. If one doesn’t, correct it first and test the brewer again.
How to Do a Basic Power Reset on a Keurig
A power reset clears temporary faults in the brewer’s electronics. It won’t fix a clogged needle or a mineral buildup, but it does handle many stuck screens and unresponsive buttons.
- Turn the brewer off. Use the power button if it responds. If it doesn’t, skip ahead to unplugging.
- Unplug the power cord from the wall outlet, not just the back of the machine.
- Remove the water reservoir, the pod holder and the drip tray. Empty the drip tray and rinse it.
- Wait at least 30 seconds. Waiting a few minutes is also fine and helps if the brewer has been running hot.
- Reinstall the reservoir and tray, plug the brewer back in and turn it on.
- Run a rinse cycle with no pod, using the brew or rinse function your model supports. Use a mug to catch the water and watch for normal flow.
If the brewer powers on and runs a clean rinse, the reset worked. If the same error returns right away, the problem is probably mechanical or related to scale, and you’ll need to work through the sections below.
Reading Error Messages and Matching Them to a Fix
Keurig brewers show short messages on the display or flash indicator lights. The wording varies across models and generations, but the common ones point to a fairly predictable set of causes. The table below summarizes what owners most often report and what usually fixes each one. Always check your manual for the exact message on your model.
| Symptom or message | Likely cause | Fix to try first |
|---|---|---|
| “Add Water” or water-level warning with a full reservoir | Reservoir not seated, float or sensor blocked by debris | Remove and reseat the reservoir, then run a power reset |
| “Descale” or descale indicator light | Scheduled maintenance based on usage, or mineral buildup | Run a full descale cycle with the manufacturer-specified solution |
| Brewer runs but little or no water comes out | Clogged needle, blocked water line, or scale in the heater | Clean the exit needle, then descale |
| Water drips or leaks from the bottom | Pod not seated, needle clogged with grounds, or a loose seal | Check pod placement, clean the needle, inspect the seal |
| Brewer won’t turn on or buttons do nothing | Electronic glitch or power supply issue | Unplug for several minutes, then retry; check outlet |
| Coffee is weak, watery or tastes off | Old scale, stale grounds, or pod issues | Descale, then test with a fresh pod |
| Brewer stops mid-cycle or shuts off | Overheating, error code, or a pod jam | Power reset, clear the pod holder, let the unit cool |
How to Clean the Exit Needle
The exit needle is the small piece that pierces the bottom of the K-Cup and lets water out. Coffee grounds and fines collect here over time, and a partial clog can cause slow flow, leaks or a pod that won’t seat. Cleaning it is one of the most effective troubleshooting steps you can take.
Steps to clean the needle
- Power the brewer off and unplug it.
- Lift the handle and remove the pod holder.
- Look up into the pod holder area. The exit needle is usually visible as a small metal point.
- Use a straightened paperclip or a soft, thin brush to clear grounds from the needle opening. Work gently. The needle is delicate, and bending it can cause leaks.
- Rinse the pod holder under warm water, dry it, and reinstall it.
- Plug the brewer in, power it on and run a rinse cycle without a pod.
Signs the needle needs attention
- Pods come out wet or soggy around the edges.
- Water sprays from the top of the pod instead of flowing into the cup.
- The brewer runs longer than usual before producing any coffee.
How to Descale a Keurig After a Reset
If a power reset and needle cleaning don’t fix the problem, mineral scale is the next suspect. Hard water deposits build up in the heating system, and that restricts flow, slows the brew and can trigger descale warnings. Descaling is safe when done as your manual describes, and it’s the single most useful maintenance task for a Keurig in a hard-water area.
Before you start
- Check your manual for the descaling solution the manufacturer specifies. Keurig sells its own descaling solution, and its instructions are written around it.
- Have a large mug or carafe to catch rinse water.
- Keep a few cups of fresh water on hand for rinsing.
- Clear the area around the brewer. Descaling involves several full reservoir cycles.
General descaling process
- Empty and rinse the water reservoir.
- Fill the reservoir with the descaling solution, following the dilution directions on the bottle or in the manual.
- Place a large mug under the spout and start the descale cycle using the method your model requires. Many models run this automatically once you press the right button or hold a key combination.
- Allow the brewer to run through its full descale cycle. Empty the mug as needed.
- Once the solution is used up, empty the reservoir, rinse it thoroughly, and refill with fresh water.
- Run several full cycles of fresh water without a pod to flush out any remaining solution. Your manual will specify how many rinse cycles to run.
Some owners use diluted white vinegar as a substitute. Vinegar is widely used in coffee equipment, but whether it’s acceptable depends on your manufacturer’s guidance and warranty terms, so read your manual before you choose it. Vinegar also leaves a strong smell that takes more rinse cycles to clear.
For a broader look at scale and why it builds up, see How to Descale a Coffee Maker and Espresso Machine Safely. The principles are the same across machines, even though the steps differ.
Checking the Water Path and Filter
Water flow problems often start upstream of the heater. If your Keurig uses a water filter cartridge, a clogged or expired filter can cause slow brewing, air bubbles and a sour taste. Check whether your model uses a filter and when you last replaced it. Manufacturers typically specify a replacement interval, and following it reduces scale buildup in the first place.
Also look for kinks or pinched tubing if you’ve moved the brewer recently, and make sure the reservoir lid seals properly. A reservoir that doesn’t sit flat can cause false water-level alerts. For filter timing and removal, When and How to Replace Your Coffee Maker's Water Filter covers the general process.
Recommended gear
You don’t need much to troubleshoot a Keurig, but a few inexpensive items make the job easier and reduce the chance of damaging parts.
- Keurig-compatible descaling solution. The manufacturer’s own product matches the instructions in your manual and removes scale without guesswork. Check price on Amazon
- Thin cleaning brushes for pod holders and needles. A small, soft brush clears grounds from the needle opening without the risk of bending metal the way a paperclip can. Check price on Amazon
- Replacement water filter cartridges for your model. Keeping a spare on hand means you can swap a worn filter immediately when flow problems start. Check price on Amazon
Common Mistakes to Avoid
- Pulling the plug without fully powering down. A short unplug is fine, but yanking the cord while the brewer is mid-cycle can leave the internal system in an odd state. Turn it off first.
- Forcing the pod holder or handle. If a pod doesn’t seat, check for a jammed pod or grounds before pushing harder. Forcing it can crack the holder or bend the needle.
- Skipping rinse cycles after descaling. Leftover solution will taste bitter or chemical, and it can cause the next brew to taste off.
- Reusing the same pod after a failed brew. A pod that has already been pierced and partly brewed won’t produce a good cup. Use a fresh one for testing.
- Ignoring the descale light. Owners often report that brewers run noticeably slower or start to taste flat once scale builds up. Descaling on schedule is cheaper than repairing a brewer that’s been running with heavy buildup.
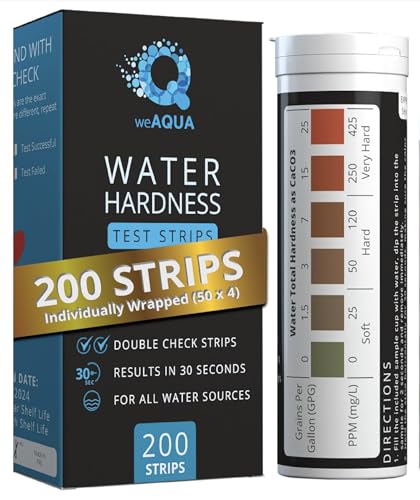
- Using the wrong water. Very hard water speeds scale formation. If your tap water is hard, descale more often than the minimum your manual suggests, or consider filtered water.
When a Reset Won’t Fix It
If you’ve done a power reset, cleaned the needle, descaled and rinsed, and the brewer still fails, the issue may be hardware. Common examples include a failed pump, a worn seal that causes persistent leaks, or a control board fault. In those cases, check your warranty status and contact the manufacturer’s support line. Continuing to run a leaking or electrically unreliable machine can cause water damage or create a safety hazard, so stop using it if you notice burning smells, sparks or pooling water near the electrical components. A qualified appliance repair technician can assess the unit if the warranty has expired.
If you’re deciding whether a repair is worth the cost, it can also help to compare your brewer with other single-serve and drip options. Types of Coffee Makers: How Each One Brews and Who It Suits lays out how different machines handle daily use and maintenance.
Tips for Keeping Your Keurig Running Smoothly
- Empty and rinse the drip tray and pod holder weekly.
- Use fresh, filtered water if your tap water is hard, and replace the filter on schedule.
- Run a rinse cycle before the first brew of the day if the machine has sat unused for a while.
- Store the brewer where the cord and water lines won’t be stressed, and keep it level.
- Note the date of each descale and filter change so you’re not guessing later.
Weak or bitter coffee can also come from brewing habits rather than a fault. If the machine is working but the cup tastes wrong, How to Fix Bitter, Over-Extracted Coffee from Your Machine walks through the variables that matter. And if your brewer is leaking, How to Find and Fix a Coffee Maker Leaking Water covers the most common sources of drips.
FAQ
How long should I unplug my Keurig to reset it?
At least 30 seconds is usually enough for a basic power reset. Waiting a few minutes is also safe and can help if the brewer has been running hot or showing a stuck message.
Will a reset fix a descale light?
No. A reset may clear the message temporarily, but the light usually means the brewer needs a full descale cycle. Run the descale process your manual describes, then rinse thoroughly.
Why does my Keurig keep saying “Add Water” when the reservoir is full?
The reservoir is often not fully seated, or debris is interfering with the water-level sensor. Remove the reservoir, check its seat and the sensor area, then reinstall it and run a power reset.
Can I use vinegar instead of Keurig’s descaling solution?
Some owners do, but you should check your manual first. The manufacturer specifies its own solution, and using a different product could affect warranty coverage. If you use vinegar, dilute it as directed and run several rinse cycles to remove the smell and taste.
When should I stop troubleshooting and contact support?
Contact the manufacturer if the brewer still fails after a reset, needle cleaning and descaling, or if you see persistent leaks, electrical problems or unusual smells. If the warranty has expired, a qualified appliance technician can evaluate the unit.
Ready to choose one?
About Graham Fisher
Graham Fisher is part of our editorial team and reviews and edits our coffee machines guides, checking product details against manufacturer specifications and owner feedback.